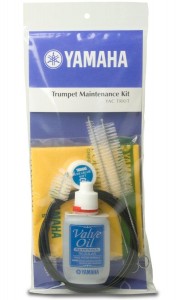
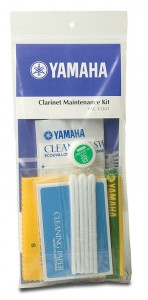
Forget about cleaning out your closets and cupboards – your trumpet might be where the real attention is needed this springtime! If you can’t remember the last time you gave your instrument a good and thorough cleaning, chances are that it’s time for some TLC for your trumpet. Yamaha is a trusted brand, and they make a really great, comprehensive maintenance kit. The Yamaha Trumpet Maintenance Kit comes complete with the following:
Superior Synthetic Valve Oil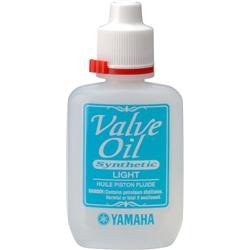
I am a trumpet player, and this is my personal favorite valve oil, and the only one I ever recommend to my students. Hold off on using the valve oil until you have finished most of your trumpet’s cleaning – this is best saved for the second-to-last step (right before you give the trumpet a final polish with the polish cloth). You definitely want to oil your valves when they are in the casings, because if they are out on the table, for instance, you run the risk of dust and debris getting on your freshly-oiled valves, and that’ll definitely slow them down. Don’t oil your valves until you are ready to screw them into their position.
Slide Grease
Don’t worry that the container is “too” small – a little dab will do ya when it comes to slide grease. I’ve had the same small round container that’s  included in the maintenance kit for probably 5 years, maybe even more. You should use it VERY sparingly, or your hands will be a greasy mess when you play, and that’ll just make your freshly-cleaned trumpet look like a mess again in a hurry, all smudged up with fingerprints. I recommend that you put a very small amount (like half the size of a tic tac or even less, literally) on each one of your slides, rub it around the circumference of the slide, then move your slide slowly in and out until it feels smooth.
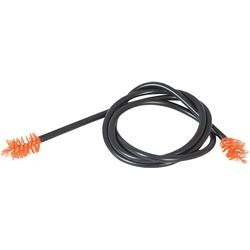
Vinyl-Coated Trumpet Cleaner (aka trumpet “snake”)
I’ve always known this to be a “snake”, so I am guessing that’s what most of you know it as also. It’s that long wire-like rope with a little brush on each end. This is probably the most important cleaning tool of them all, in my opinion. Also – if it’s been a while since you’ve given your trumpet slides a good cleaning, be prepared for a gross-out factor when you do your first pass-through with the snake. To use this tool, just remove your trumpet’s slides. I always start by removing the tuning slide, then passing the snake through the lead pipe (that’s the tube that your mouthpiece goes into). I then pass through each removed slide separately, rinsing them quickly with water first (be careful to avoid any cork – like on your water keys – aka your “spit valves” – because it’s best not to soak these…obviously, given the fact that they are called “water keys”, they can get wet, but you should avoid submerging them). Go slowly when you are using your snake, especially when you use it on the smaller slides. This is not a job that you should rush, because you don’t want to mistakenly dent your slides – that’s a real hassle that will land your trumpet at the repair shop. Take your time, and don’t pull hard. Of course, the lead pipe is straight, so that’s an easy one to clean, but even on that one, you shouldn’t just yank it roughly through (believe me – having taught young students, I have seen some really unnecessarily aggressive snaking!). Because the snake is vinyl-coated, it won’t scratch your instrument, but the diameter of your trumpet’s slides is pretty small, so you don’t want to snag the end by pulling too abruptly.
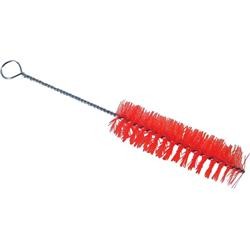 Valve Casing Brush
The valve casing brush is important to use regularly, to keep your valves moving at their peak. There’s nothing worse than playing a trumpet with slow, sluggish valves. Basically, if you find that your valves are moving slowly after you oil them, you should break out your valve casing brush and give your valves a more thorough cleaning. Wipe off your valves, wipe out the inside of the casings, use the casing brush, and then put your valves back in, apply a little oil, and the valve action should be back to its best. Note: if you follow those steps and your valves are STILL not working optimally, you should bring your trumpet to the repair shop. Even if you can’t see it, there may be a small dent or some warping going on, and there’s no amount of cleaning that can fix that. Your trumpet valves should move up and down without any resistance when your trumpet valves and valve casings are clean. Valve problems are an endless frustration for many student players, and they tend to compensate by putting on an excessive amount of oil – this actually won’t help, and it will only make matters worse. Often, student players may have been a little too rough with their trumpet – maybe they banged it on a stand or something that seemed like no big deal, but actually could’ve caused some problems that need to be remedied at a repair shop. Another problem that can cause student players in particular to have problems with slow valve action (particularly that the valve will go down just fine, but is slow on getting back up), is that they are not pressing the valves down straight. Remember, pistons do not move at a diagonal – they go straight up and down, so it’s important that a proper hand position is used, and not an angled position that inadvertently pushes the valves at a slant. Before you head to the shop, check that your hand and fingers are going straight towards the valves. Also, if you have been pushing the valves down with the wrong, slanted position over a long period of time, you may still need a trip to the shop because you can actually get the valve a little bent out of shape that way.
Mouthpiece Brush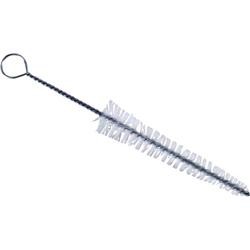
This one is pretty self-explanatory. Your mouthpiece will get dirty – and luckily, it’s very easy to clean. Rinse it out with water, pass the mouthpiece brush through it a few times, rinse again, and you’ll be back in business. Just look through it – hold it up to a light – to make sure you’ve gotten all the nastiness out. Don’t let this be an infrequent habit – I recommend cleaning out your mouthpiece at least once a week, especially if you EVER play after eating (which you absolutely shouldn’t, but must to the chagrin of their teachers, a whole lot of students do).
 Untreated Polish Cloth
The polish cloth is best used as your very last step in the cleaning routine. Just rub down your trumpet’s exterior, never applying excessive pressure, to remove smudges and fingerprints, as well as any excess grease or oil that may have gotten on your trumpet. If you have a silver trumpet, you may want to invest in the additional purchase of a silver polishing cloth (not included in the kit). A silver polishing cloth will maintain that lustrous finish that your silver (or silver-plated) instrument had when it was new – and this should be used regularly to prevent tarnishing.
After you are done cleaning your trumpet, rinse the snake brushes, casing brush, and mouthpiece brush with a little soap and water (I use mild dish detergent). You don’t want to leave them with all the gunk and grime they have collected during the cleaning process! Your untreated polishing cloth can also be cleaned with soap and water, then hung dry, but your silver polishing cloth cannot we washed – you use it until it is no longer effective, then you buy a new one (it’s treated, and that is why you don’t want to wash it – that’d just strip it of its polishing “powers”). Happy spring trumpet cleaning!

